

Cart
0
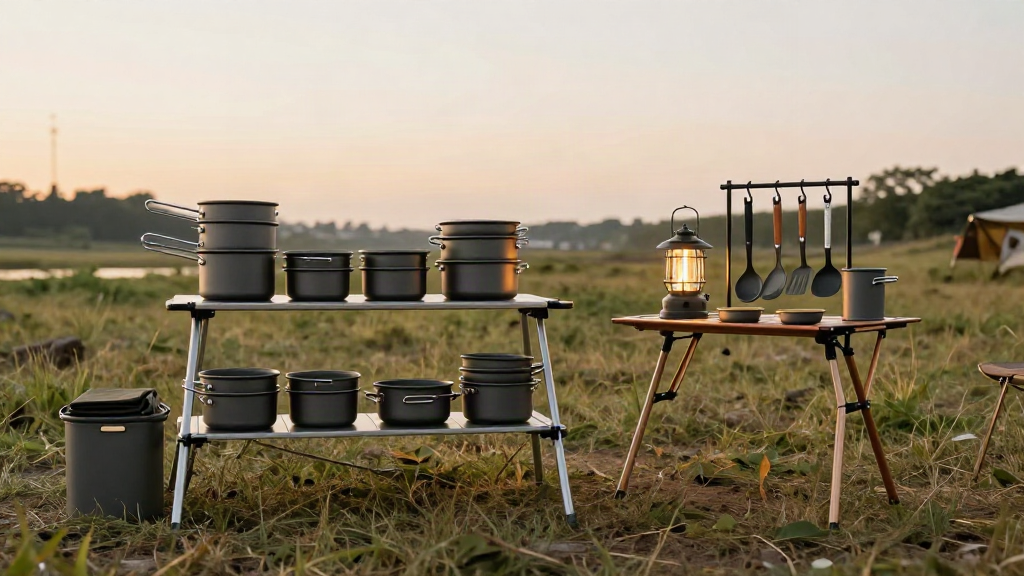
A well-packed camp kitchen is the difference between a relaxed morning coffee and twenty minutes of digging through a box for the one pan you actually need. When you carry caravan pots and pans, the goal is simple: pack cookware so it stays quiet, clean, and within reach, no matter how bumpy the road gets.
This guide walks you through a step-by-step system for organizing and packing your pots, pans, and camp cookware for caravan and car-camping trips.
Start With the Right Cookware, Not More Cookware
The biggest packing mistake is bringing too much. For most caravan setups, three pieces cover nearly every meal:
- One mid-size pot (around 2-3 liters) for pasta, rice, soups, and boiling water.
- One frying pan for eggs, pancakes, and quick sears.
- One small saucepan for sauces, tea, and reheating.
Choose nesting cookware where you can, so the small piece tucks inside the larger one instead of taking up its own slot. Aluminum and lightweight aluminum alloy sets keep weight down without sacrificing durability, which matters when every kilogram counts on a long tour.
If you often cook for a group, add a single larger stock pot rather than several pans. One big vessel packs tighter and does the work of two.
Step 1: Group Your Cookware Before You Pack It
Lay everything out on a table or the ground first. Sort it into three piles:
- Cooking - pots, pans, lids.
- Prep and serving - bowls, cutting board, utensils, plates.
- Consumables - oil, spices, matches, cleaning cloths.
Seeing the full pile before it goes into a cupboard keeps you honest. You will spot the duplicate spatula or the third pot that never gets used.
Step 2: Nest and Stack to Save Space
Once you have your core pieces:
- Nest smaller pots inside larger ones.
- Lay flat lids between layers, or slide them down the side.
- Place a cloth or thin towel between metal surfaces so nothing rattles or scratches in transit.
Nesting turns a scattered pile into one compact stack that fits a single cupboard or crate. That stack is also easier to lift in and out of the caravan, which matters after a long day of driving.
Step 3: Protect Surfaces and Silence the Rattle
Metal cookware and a moving vehicle are a noisy combination. A few cheap fixes solve it:
- Wrap each piece in a thin camp towel (which doubles as a drying cloth).
- Use a small cloth bag or a cut-down mesh bag for lids and utensils.
- Pack heavier pieces low and toward the center, and lighter items on top.
A quiet kitchen is a sign of a well-packed kitchen. If you can hear your pans shifting on a corner, repack before the next leg.
Step 4: Build a Vertical, Grab-and-Go Station
The real upgrade is not how you pack cookware for storage, but how you make it usable the moment you stop. Instead of unpacking everything onto the ground, set up a single tidy station that holds your gear at working height.
This is where an Adjustable Camping Table Storage Rack With Hooks earns its place. It clamps to a table edge and gives you hooks for pots, stoves, and cookware, so utensils hang within reach and the tabletop stays clear for actual cooking. Nothing gets lost in the grass, and everything you need is at eye level.
A rack like this also means you pack less "loose." Your cookware has a home on arrival, so cleanup and repacking take minutes instead of a full reset.
Step 5: Keep Small Items in One Kit
Loose small items are the fastest way to lose a camp kitchen to clutter. Corral them:
- Keep spices, oil, and condiments in one small caddy.
- Keep cleaning cloths, a scrubber, and a little soap together in a pouch.
- Keep matches or a lighter in a known zip pocket, always in the same spot.
When every small item has one home, you never have to unload the whole caravan to find the salt.
Step 6: Use Your Pack to Fill the Gaps
Cookware and food live together best when the rest of your gear is organized around them. If you are carrying a full load of camp gear, a large-capacity pack such as the 60L Outdoor Hiking Camping Travel Backpack can swallow softer items, towels, and lighter cookware accessories, freeing up hard cupboard space for your pots and pans.
The principle is the same everywhere: hard, nested cookware in fixed storage, soft items in packs, small items in designated pouches.
Step 7: Test the Kitchen Before You Leave
Before your first trip out, do a dry run:
- Pack the kitchen exactly as you plan to travel.
- Set up the station as if you had just parked.
- Cook one simple meal.
This five-minute rehearsal reveals the rest of the gaps - the pot with no lid, the missing bottle opener, the pan you cannot reach without moving three other things. Fix those issues at home, where you have options, not at a windy campsite at dusk.
A Quick Checklist for Caravan Pots and Pans
- Nesting system that fits one cupboard or crate
- Cloth or liners between metal pieces
- Lids secured so they do not shift
- One vertical station (rack, hooks, or table clamp)
- Small items in one caddy and one pouch
- Heavy items low, light items high
- One dry-run meal before the trip
Pack Once, Cook Everywhere
Packing caravan pots and pans well is not about squeezing in more gear - it is about building a system you can trust. Group, nest, protect, and station your cookware, keep small items together, and your camp kitchen becomes a calm, well-ordered corner of any trip.
Set up your pots and pans once, and every meal on the road gets easier. From the first morning coffee to the last campfire dinner, dependable, organized gear lets you spend less time searching and more time enjoying the outdoors.
